SharpSpring comes with a lot of lesser-known but great functionality built right into the email editor. Making a custom unsubscribe button is one of those things.
It’s really easy to do, but the solution might not seem that obvious.
1. Design your button
Add a button to your email using the SharpSpring button element and customise the appearance to match your email design.

2. Get the unsubscribe link merge field
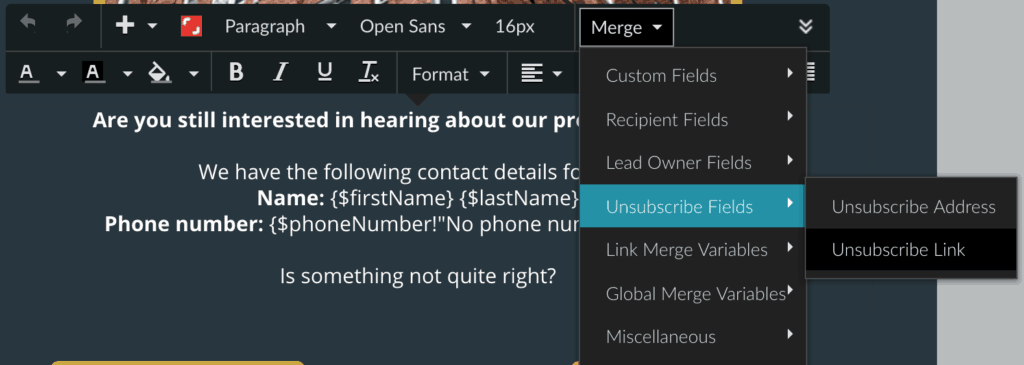
In the list of merge field categories is the “Unsubscribe Fields”. This category contains the “Unsubscribe Address” and the “Unsubscribe Link”. Insert the “Unsubscribe Link” merge field into your text somewhere, you just want the code that it generates so it doesn’t matter where you put it. It should look like this: {$unsubscribeLink}

3. Link up the button
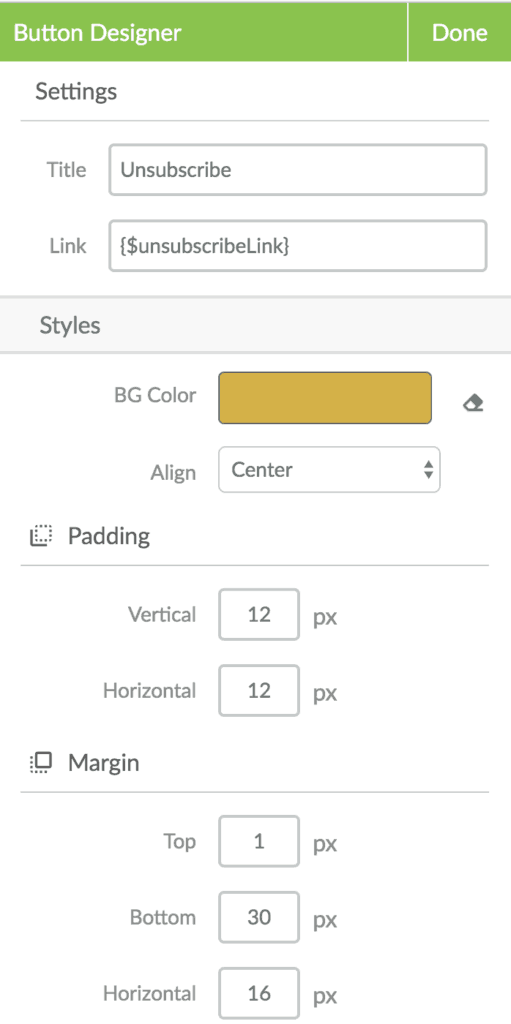
Copy the merge code that is generated and insert it into the “Link” field for your custom button. It should look something like the below screenshot.

4. Save and Test!
That’s it, you’re done! Save your email, and as always test it to make sure that your new unsubscribe button is working as it should. Now you can drag it around and position it wherever you like in the email.
Need help?
Get in touch with us for help designing your SharpSpring emails!


