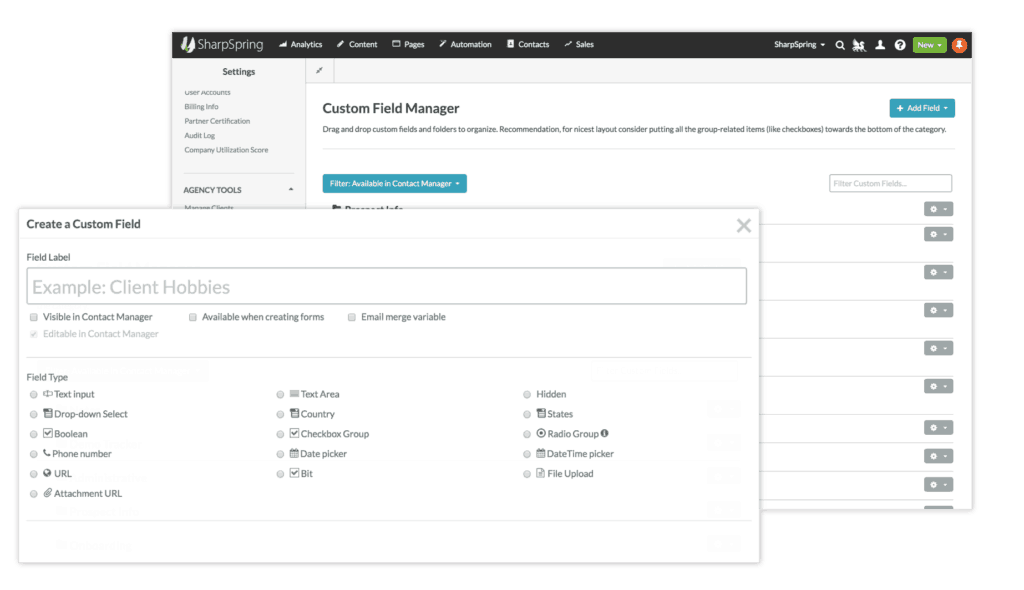
When you aren’t showing field labels, (like I showed you how to do with SharpSpring in this blog post), it’s important to make sure that your field purposes are still clearly understood. For most of them, it’s easy to customise the placeholder value. There is one default field though that presents a challenge: “How did you hear about us?”
You might recognise this field from the little checkbox at the top of the SharpSpring form builder page:
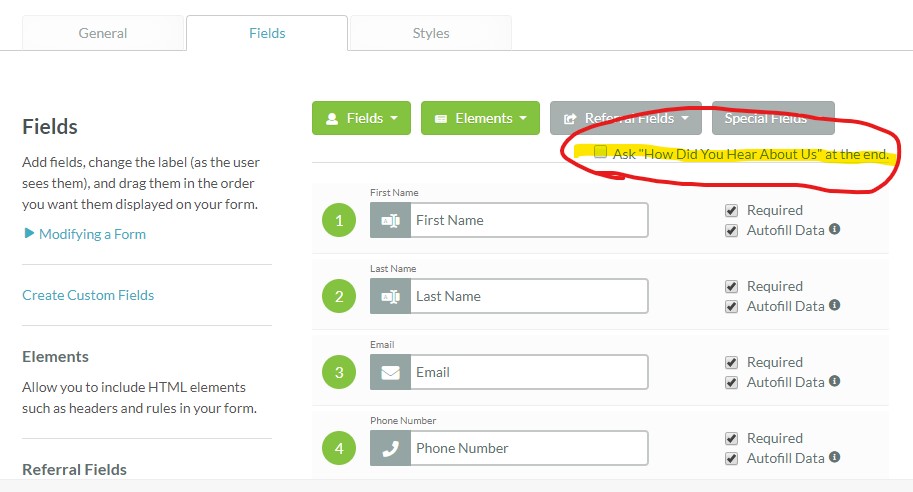
SharpSpring’s default how did you hear about us field
Unlike every other field, there are no other options for this field. It’s just enabled, or it’s not. This particular field doesn’t have a placeholder either, so you can’t just get away with using the default one. The field just doesn’t make sense to users without the field label to tell them what to do. So why is this?
Why can’t I customise the how did you hear about us field?
The main reason is that this field is connected to your SharpSpring campaigns. The options for this field are your campaign options. So, in order to avoid breaking your campaign settings, this field is closely guarded.
Is there any way around it?
There is, and it can be implemented by anyone with basic knowledge of SharpSpring form building, custom fields and visual workflows.
There are two parts to this solution, a custom field that contains the options you want to have available, and a visual workflow that is triggered when the form is submitted. It then sets the lead campaign based on the selection in the custom field.
Part 1: The custom field
To create a custom field with a custom placeholder, you need to go to your field settings. This is usually at myaccount.marketingautomation.services/settings/fields or click the little user icon in the top right of SharpSpring and then select “Settings”.
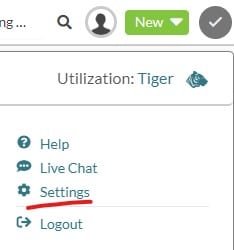
You will find custom fields under the “Features” heading.
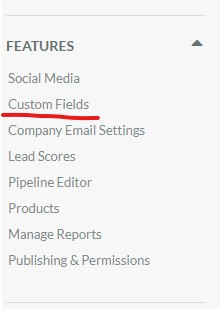
Custom Field settings are under the Features section in SharpSpring settings.
Create a new field and you will see the “Field Label” at the top of the screen. Below the field type selection, you will see the “Placeholder” box. Type your field name into the “Field Label” box and your desired custom placeholder into the “Placeholder” field. Make sure that the “Available when creating forms” checkbox is selected.
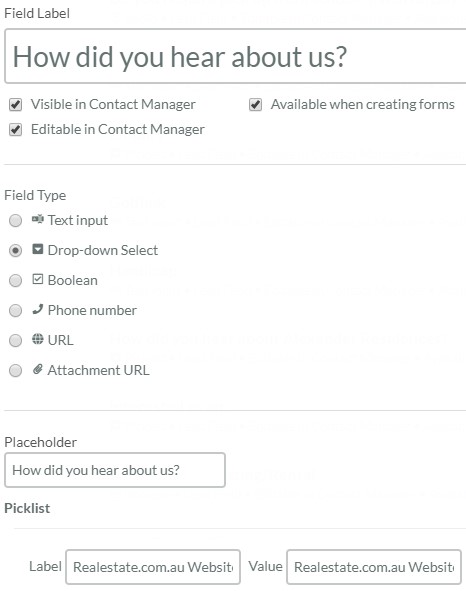
Custom how did you hear about us field
In the picklist section, create options for all your SharpSpring campaigns. It doesn’t matter if they are worded the same or not just so long as you recognise what campaign they are meant to match up with.
Part 2: The visual workflow
Once you have your custom field setup with all the necessary options, create a new visual workflow. Your open trigger will be when a contact fills out your chosen form.
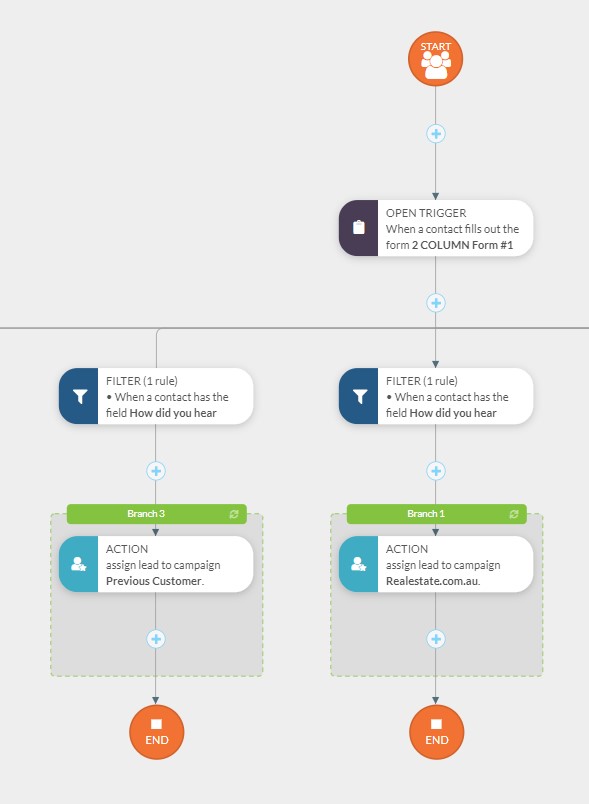
A visual workflow to assign campaigns based on our custom field
You will then need to create a filter for each of your options. The filter will be when a lead (contact) has the field “your custom field name”. Each filter will have a different field value, one for each of your options, and it should match exactly.
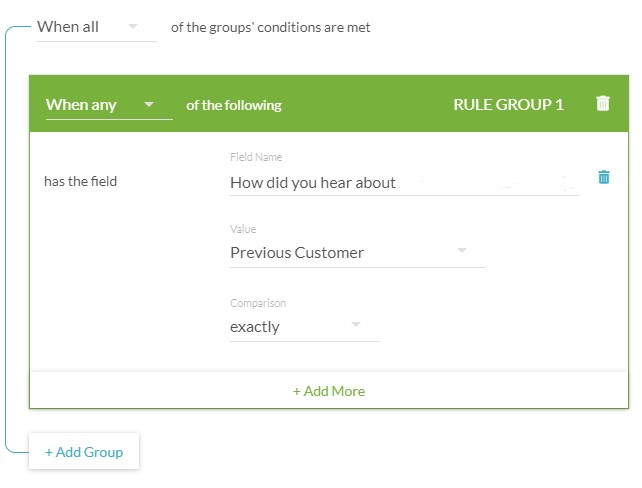
Select a field value for each of your filters.
Below each filter, add a matching action. The action will assign a contact to a campaign. The campaign name will be the one that matches the field value in your custom field filter.
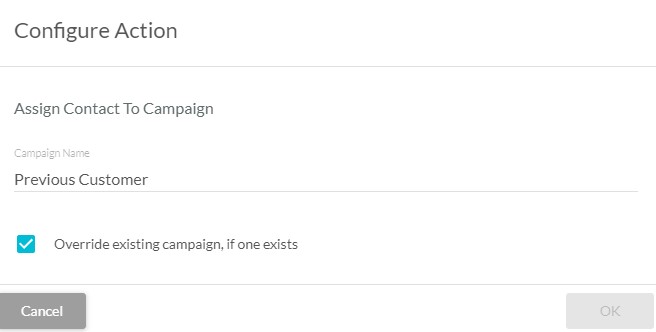
Assign a contact to a campaign in a visual workflow
Choose whether or not you want to override the existing campaign, if one exists. This is not required for this to work, and in most cases, you probably don’t want to override the campaign if it already exists.
Once you have done this for each of your field values, you can go ahead and activate your visual workflow. Make sure to also add your custom field to your form and test, test, test! Test every single option and make sure it works as it should before you start sending real leads to the form.
Please note, you will need to have the appropriate permissions to create and edit custom fields for any of this to work.
Need more help?
Having trouble with your SharpSpring form stylesheets or appearance? Want to get started with the SharpSpring CRM? We can help! We have a great deal of experience in setting up custom forms, form fields, stylesheets and general usage of the SharpSpring platform. Why not work with us today and get more from your SharpSpring investment.

