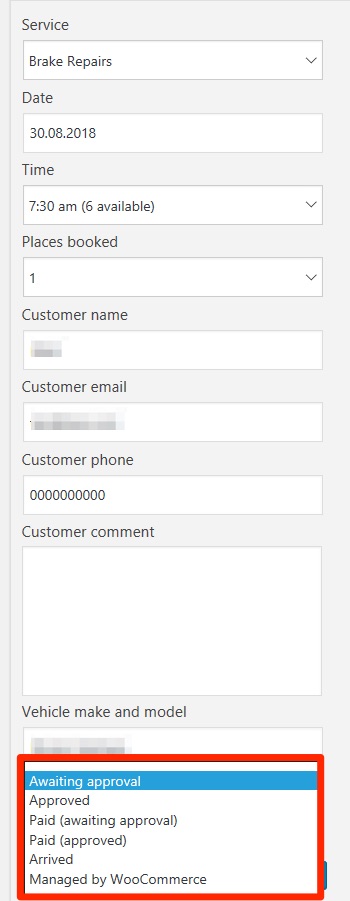
When you need to update the status of an appointment in Webba Booking, navigate to the appointments screen and find the appointment you are looking for.
Scroll to the end of the editor form and click the “Status” field to select a new status from the list. The status options you can choose from are:
- Awaiting approval: The booking has been placed but it needs confirmation by the service provider, which is probably you. That means that unless you need to double check something first, you probably won’t use this status when you are adding a booking in the backend. When this option is selected, an email will be sent to the customer after you save the booking, telling them that their booking has been received but that it is awaiting confirmation.
- Approved: The booking is all good to go. The customer will received an email telling them their booking has been confirmed when this status is selected and the booking is saved.
- Paid (awaiting approval): This status is the same as the normal “Awaiting approval” status, except that it indicates the customer has already paid. You will only use this status if you accept payments at the time of booking.
- Paid (approved): This is the same as the normal “Approved” status, except that it indicates the customer has already paid. Again, you will only use this status if you accept payments at the time of booking.
- Arrived: If you choose to track bookings that have arrived at your location, you can update the status to “Arrived” to indicate that they are there and “checked-in”.
- Managed by WooCommerce: You will only use this status if your website processes bookings through the WooCommerce plugin. It serves to indicate that customer notifications are being managed by that plugin instead.
Once you have selected the appropriate new status, click the blue “Save” button at the end of the form.


